Knowing how to remove the background in Adobe Illustrator can save you hours of editing, whether you’re designing logos, preparing product photos, or creating marketing graphics. Illustrator offers several ways to eliminate unwanted backgrounds, including its built-in AI-powered Remove Background feature, Image Trace, clipping masks, and manual vector editing.
When I first worked with background removal in Illustrator, I noticed that one technique didn’t work equally well for every image. Simple logos were easier to edit with Image Trace, while complex photographs required more precise tools.
In this guide, I’ll walk you through five practical methods, explain when to use each one, and show you how to export images with transparent backgrounds.
How to Remove a Background in Adobe Illustrator With One Click
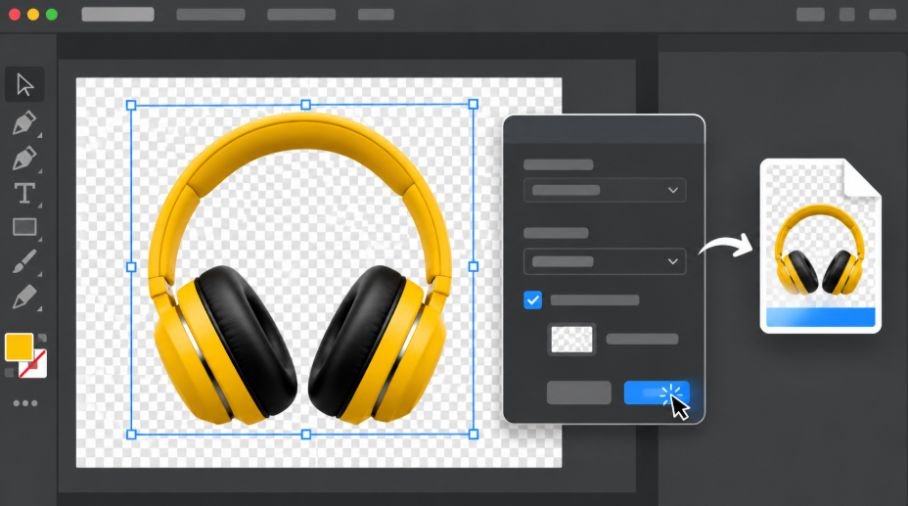
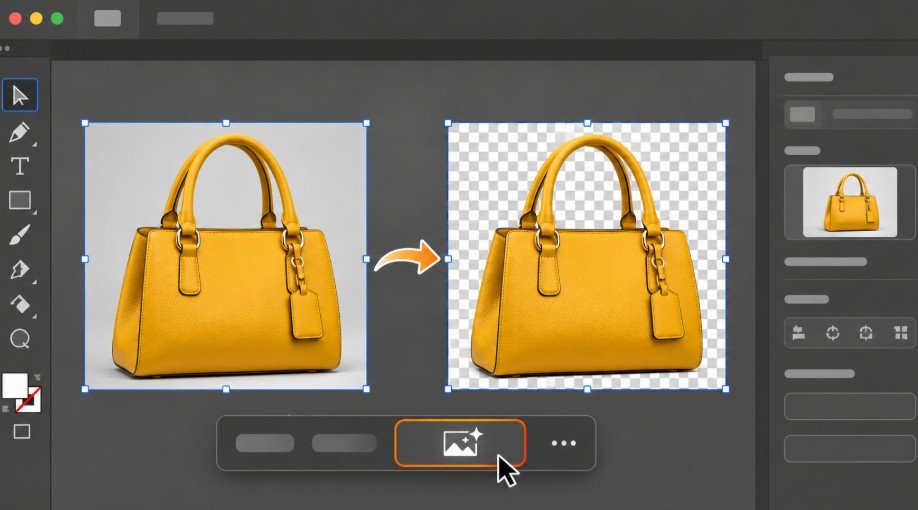
The easiest way to remove an image background in Illustrator is to use its built-in Remove Background feature. This AI-powered tool identifies the main subject and automatically makes the surrounding area transparent.
Illustrator’s AI-powered capabilities extend beyond background removal, and exploring AI tools in Adobe Illustrator can help you discover additional ways to automate repetitive design tasks, refine artwork, and improve your creative workflow.
It’s especially useful for product photos, promotional graphics, and other images with recognizable subjects.
Step 1: Import and Select Your Image
Open Illustrator and select File > Place to import your JPG or PNG image.
Choose the Selection Tool (V) from the toolbar and click the image you want to edit.
Step 2: Find the Remove Background Feature
Once you select the image, look for the Contextual Task Bar beneath it.
Click Remove Background to begin processing.
If the button isn’t visible, check the Properties panel under Quick Actions. You can also access the feature through the Object menu, Control panel, or right-click menu in supported Illustrator versions.
Step 3: Review the Transparent Result
Illustrator automatically isolates the subject and removes the surrounding background.
I recommend zooming in to examine the edges, especially around hair, clothing, and irregular shapes.
If the results need improvement, a manual masking technique may offer better control.
How to Remove a White Background in Illustrator Using Image Trace
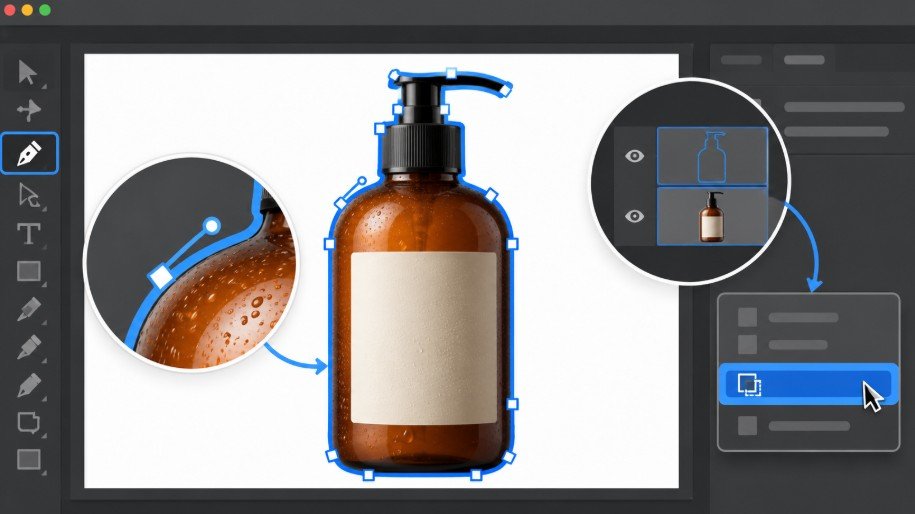
Image Trace is one of my preferred methods for removing white backgrounds from simple logos, icons, and flat illustrations.
Since Image Trace can also convert raster artwork into editable vector paths, understanding how to vectorize an image in Illustrator can help you refine traced logos, adjust individual shapes, and prepare graphics for different design applications.
It converts raster images into editable vector shapes, making the artwork easier to resize and customize.
Step 1: Open the Image Trace Panel
Import the image, select it, and navigate to Window > Image Trace.
Choose a preset based on your artwork. Black and White Logo works well for simple silhouettes, while High Fidelity Photo preserves more colors and details but can create many complex paths.
Step 2: Adjust the Tracing Settings
Open the advanced settings and locate Ignore Color.
Select white or another unwanted background color. This prevents Illustrator from creating vector shapes for that color.
Older versions may show an Ignore White option instead.
Step 3: Expand and Remove Unwanted Shapes
Click Trace if needed, then select Expand to convert the tracing into editable vector paths.
If background shapes remain, right-click the artwork and choose Ungroup. Use the Direct Selection Tool (A) to select unwanted background shapes and press Delete or Backspace.
I prefer Ignore Color when the background is simple, but manual deletion gives me additional control after tracing.
How to Remove a Background Using the Pen Tool and Clipping Mask
When I need precise results, I use the Pen Tool to create a custom outline around the subject.
If you’re still learning the software, this introduction to how to use Adobe Illustrator for beginners can help you understand the workspace, essential tools, and basic editing techniques before moving on to more advanced tasks.
This method works particularly well for product photography, packaging graphics, and images with clearly defined edges.
Step 1: Draw an Outline Around the Subject
Select the Pen Tool (P) and set its fill color to None so the shape doesn’t obscure your image.
Click around the subject’s perimeter, placing anchor points along its edges. For curved areas, click and drag to create smooth curves.
Return to the first anchor point to close the path.
Step 2: Create the Clipping Mask
Make sure your completed outline sits above the original image.
Choose the Selection Tool (V), select the path and image together, and navigate to Object > Clipping Mask > Make.
Alternatively, press Ctrl + 7 on Windows or Command + 7 on Mac.
Illustrator hides everything outside your custom outline.
Unlike permanent deletion, a clipping mask preserves the underlying image, allowing you to adjust the visible area later.
How to Remove a Background With the Magic Wand Tool
The Magic Wand Tool is useful when working with vector graphics containing multiple objects with similar colors.
Unlike Photoshop’s Magic Wand, Illustrator’s version selects objects based on attributes such as fill color and stroke.
Open your vector artwork and select the Magic Wand Tool (Y).
Click the unwanted background object. Illustrator selects objects with matching attributes according to the tool’s settings.
Review the selection carefully before pressing Delete.
I generally use this approach for editable illustrations rather than photographs because the Magic Wand doesn’t directly erase raster image backgrounds.
How to Delete a Background From Vector Artwork

Sometimes a white background is simply a rectangle positioned behind a logo.
In this situation, I don’t need an AI background remover or Image Trace.
I open the Layers panel, locate the background object, and select it with the Direct Selection Tool (A).
If the artwork is grouped, I double-click the group to enter Isolation Mode, select the unwanted background, and delete it.
This method preserves the original vector artwork without unnecessary tracing.
How to Make a Background Transparent in Illustrator
After learning how to remove the background in Adobe Illustrator, the next important step is checking transparency.
Illustrator displays a white artboard by default, even when no background object exists.
To verify transparency, navigate to View > Show Transparency Grid.
The checkerboard pattern reveals transparent areas.
If unwanted white shapes remain, inspect the Layers panel and remove them before exporting.
How to Export a Transparent PNG From Illustrator
For website graphics, online stores, presentations, and digital advertisements, I typically export finished artwork as a transparent PNG.
Navigate to File > Export > Export As and select PNG.
Choose your filename and save location. Enable Use Artboards when you want to export a specific artboard area.
Click Export and select Transparent under Background Color in the PNG options.
Choose an appropriate resolution based on your intended use.
I also keep the original AI file for future editing. PNG preserves transparency, while standard JPG files don’t support transparent backgrounds.
Why Is Illustrator Background Removal Not Working?
Even after following the correct steps, you might encounter a few common problems.
Why Does My Image Still Have a White Background?
The white area may be part of the original raster image or a separate vector object.
Enable the Transparency Grid and inspect the Layers panel to determine which situation applies.
Why Does My Transparent PNG Still Look White?
Check whether you selected Transparent during export. Also verify the file in an application that displays transparency correctly, since some image viewers show transparent areas as white.
Why Do My Image Edges Look Rough?
Low-resolution source images, inaccurate clipping paths, and unsuitable tracing settings can create jagged edges.
I recommend using a higher-quality original image and refining the outline rather than repeatedly tracing the same artwork.
Why Can’t I Find the Remove Background Button?
The feature may not be available in your installed Illustrator version.
Check for updates through Adobe Creative Cloud. If you cannot use the native feature, try a clipping mask or Image Trace.
Frequently Asked Questions
1. Can I Remove a Background in Illustrator Without Photoshop?
Yes. You can use Illustrator’s native Remove Background feature, clipping masks, Image Trace, and vector selection tools without opening Photoshop.
2. How to Remove Background in Adobe Illustrator Without Losing Quality?
Start with a high-resolution source image, avoid unnecessary rasterization, and preserve editable vector paths whenever possible. Save the original AI file before exporting.
3. How Do I Remove a White Background From a Logo?
Use Image Trace with Ignore Color for simple raster logos. For editable vector logos, locate and delete the background shape directly.
4. Which Background Removal Method Works Best for Product Photos?
I recommend starting with the native Remove Background feature. If you need more control around defined edges, use the Pen Tool and a clipping mask.
Final Thoughts
Removing backgrounds in Illustrator becomes much easier once you understand how different tools handle photographs, logos, and vector graphics.
I usually start with the automatic background remover for photographs, Image Trace for simple logos, and clipping masks when I need precise outlines.
Before finishing any design, I check the Transparency Grid and export settings to ensure the image looks correct.
Choosing the right technique helps create clean, professional graphics for websites, online businesses, advertising materials, and print designs.