If you design graphics in Adobe Illustrator, sooner or later you will need to change the size of your artboard. Maybe your design expands beyond the canvas, or perhaps you chose the wrong dimensions when creating the document.
Learning how to resize artboard in Illustrator is one of the simplest yet most important skills for working efficiently in vector design. Instead of creating a new document or moving artwork around, Illustrator allows you to adjust artboard dimensions in just a few seconds.
When I first started using Illustrator, I often struggled with layouts that did not fit the artboard correctly. After discovering the different ways to resize artboards, my workflow became much faster and more organized.
In this guide, I will explain the easiest ways to resize artboards in Illustrator, when to use each method, and a few professional tips that help designers manage layouts more efficiently.
Key Takeaways
- The Artboard Tool is the fastest way to resize artboards visually
- The Properties Panel allows precise dimension adjustments
- Illustrator can automatically resize artboards to match artwork
- Choosing the correct artboard size improves design workflow
Why Artboard Size Matters in Illustrator
The artboard is essentially the canvas where your design lives. Every graphic you export, print, or share is based on the dimensions of the artboard.
If the artboard is too small, important parts of your artwork might get cropped during export. On the other hand, if the artboard is too large, it becomes harder to maintain alignment and distribution.
Proper artboard sizing helps designers manage layouts, prepare files for export, and maintain consistent dimensions across different projects. That is why understanding how to resize artboard in Illustrator is such an important part of working with vector graphics.
Professional designers frequently resize artboards while refining layouts, especially when working on branding, posters, or social media graphics.
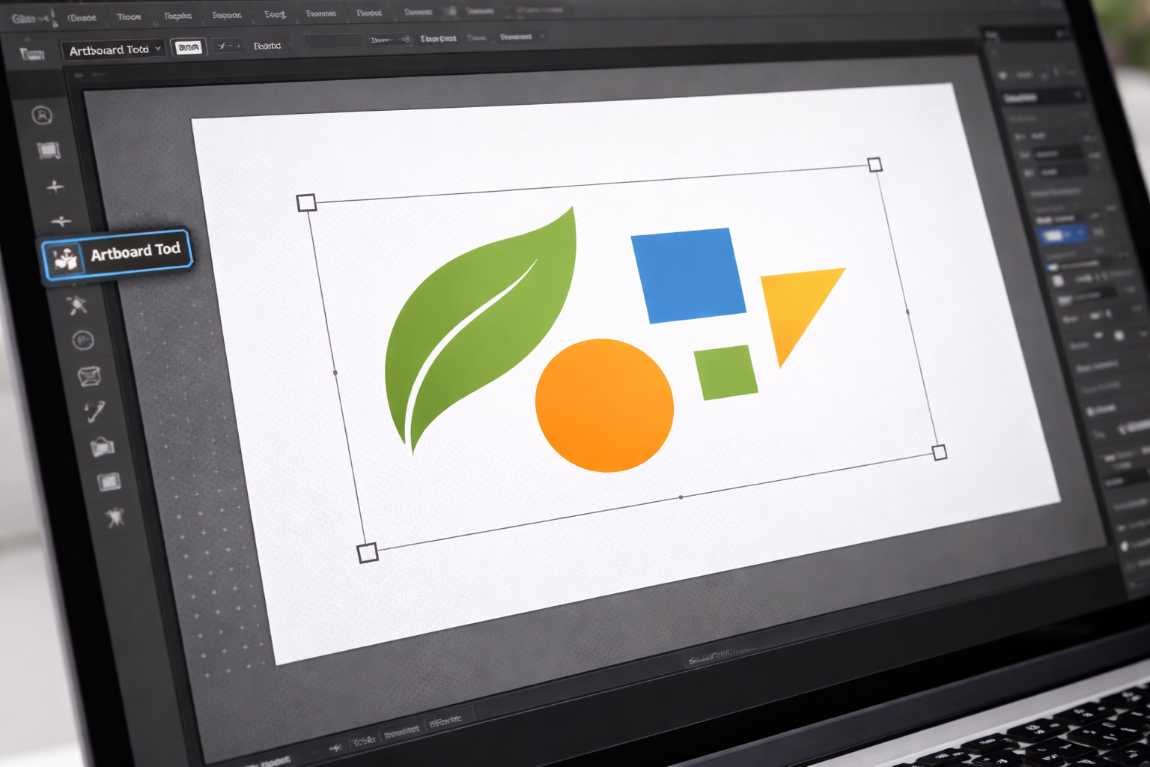
How to Resize Artboard in Illustrator Using the Artboard Tool
The Artboard Tool is the most common method for resizing artboards. It allows you to visually adjust the size of the canvas directly inside the workspace.
I personally use this method whenever I need quick adjustments while designing.
Step Flow
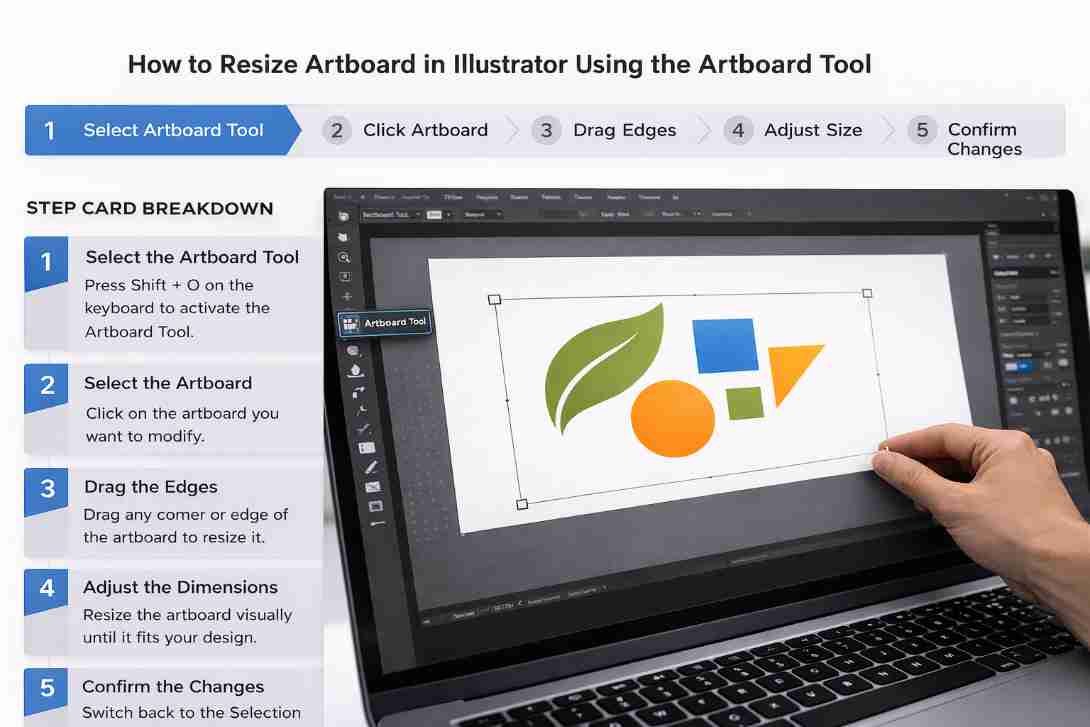
Select Artboard Tool → Click Artboard → Drag Edges → Adjust Size → Confirm Changes
Step Card Breakdown
Step 1: Select the Artboard Tool
Press Shift + O on the keyboard to activate the Artboard Tool.
Step 2: Select the Artboard
Click on the artboard you want to modify.
Step 3: Drag the Edges
Drag any corner or edge of the artboard to resize it.
Step 4: Adjust the Dimensions
Resize the artboard visually until it fits your design.
Step 5: Confirm the Changes
Switch back to the Selection Tool or press Enter.
This method works best when adjusting artboards during the design process.
How to Change Artboard Size from the Properties Panel

Sometimes you need exact measurements instead of visual adjustments. In that case, the Properties Panel provides a more precise method.
Designers often use this method when preparing graphics for print or social media templates.
Step Flow
Select Artboard Tool → Open Properties Panel → Enter Width and Height → Apply
Step Card Breakdown
Step 1: Activate the Artboard Tool
Press Shift + O to access artboard settings.
Step 2: Open the Properties Panel
Look for the artboard settings on the right side of the Illustrator interface.
Step 3: Enter Exact Dimensions
Type the required width and height values.
Step 4: Apply Changes
Illustrator updates the artboard size instantly.
This approach ensures your artboard improve graphic design skills requirements.
How to Resize Artboard to Fit Artwork Automatically
Illustrator also includes a feature that automatically resizes the artboard to match your artwork. This is especially helpful when exporting logos, icons, or graphics that should fit perfectly within the canvas.
Step Flow
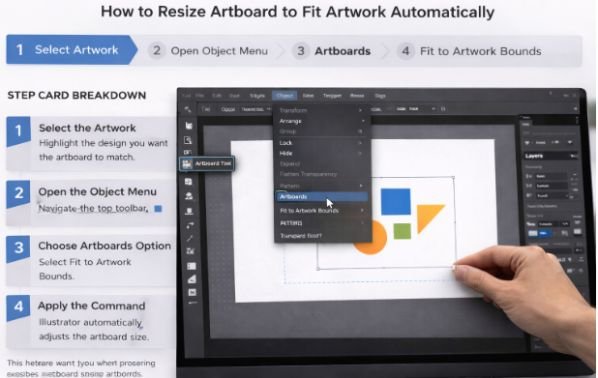
Select Artwork → Open Object Menu → Artboards → Fit to Artwork Bounds
Step Card Breakdown
Step 1: Select the Artwork
Highlight the design you want the artboard to match.
Step 2: Open the Object Menu
Navigate to the top toolbar.
Step 3: Choose Artboards Option
Select Fit to Artwork Bounds.
Step 4: Apply the Command
Illustrator automatically adjusts the artboard size.
This feature saves time when preparing graphics for export or presentation.
How to Set the Artboard Size When Creating a New Document
The easiest way to manage artboard size is to set the correct dimensions at the beginning of a project.
Step Flow
Create New Document → Enter Artboard Size → Choose Units → Start Designing
Step Card Breakdown
Step 1: Create a New Document
Press Ctrl + N to open the new document window.
Step 2: Enter Artboard Dimensions
Specify the width and height of your design.
Step 3: Select Measurement Units
Choose pixels, inches, or millimeters depending on your project.
Step 4: Create the File
Illustrator opens the document with the selected artboard size.
Starting with the correct artboard size helps reduce unnecessary resizing later.
Common Artboard Resizing Mistakes
While resizing artboards is simple, beginners sometimes make a few common mistakes.
One common mistake is confusing artboard resizing with artwork scaling. Changing the artboard size does not automatically resize the objects inside it.
Another issue is ignoring measurement units. Designers sometimes switch between pixels, inches, and millimeters without realizing it, which can affect layout accuracy.
Understanding these differences helps prevent layout problems during export.
Professional Illustrator Workflow Tips
Over time, I learned that professional designers follow a few simple habits when working with artboards.
First, they often create multiple artboards within one document. This allows them to design several layout variations without creating new files.
Second, they frequently resize artboards while refining compositions. Design ideas evolve during the creative process, and flexible artboards help accommodate those changes.
Finally, they use the automatic artboard fitting feature before exporting graphics. This ensures exported images match the artwork dimensions exactly.
These small workflow adjustments make Illustrator projects much easier to manage.
Frequently Asked Questions
1. What shortcut resizes the artboard in Illustrator?
Press Shift + O to activate the Artboard Tool and adjust the artboard size.
2. Can I resize artboards after creating a document?
Yes. Illustrator allows artboards to be resized at any time.
3. How do I resize the artboard to match artwork?
Use the Fit to Artwork Bounds option inside the Object menu.
4. Can Illustrator support multiple artboards?
Yes. Illustrator allows multiple artboards in a single document.
5. Does resizing the artboard change the artwork size?
No. Resizing the artboard only changes the canvas size, not the artwork.
Final Thoughts on Resizing Artboards in Illustrator
Once you understand how to resize artboard in Illustrator, managing design layouts becomes much easier. The Artboard Tool provides quick adjustments, while the Properties Panel allows precise control. Automatic resizing options also help when preparing files for export.
With these techniques, you can easily adapt your canvas to match your design and maintain a clean, organized Illustrator workflow.